This past week, our cohort was given the opportunity to visit the SD#5 design lab. The lab is based out of a basement space under the gym at Kootenay Orchards. I was surprised when we entered the space’s size and how it was utilized. It was clean, well organized, and minimalistic, boasting function over flash. As we began the workshop, we were first introduced to all the tools the lab had access to. These tools included VR headsets, 3D printers, iPads, robotics kits for all ages, coding tools, train sets, tons of outdoor ed equipment, and classroom resources. I was very excited when we had the chance to talk about the 3D printers. I own two printers, and it was enlightening to learn more about the machines the instructor chose and why. The Lab had not one, not two, but three X-1 Carbon printers from Bamboo Lab. These printers were chosen for their ease of use and robustness. After speaking with the instructor, he mentioned that he completes almost no printer maintenance or troubleshooting. Printer maintenance and troubleshooting are the bane of my existence regarding my own devices. After discussing printing, I worked on two other activities. The first was a game called Pixicade, where you draw and create games, and the second was a train-building set.
Pixicade
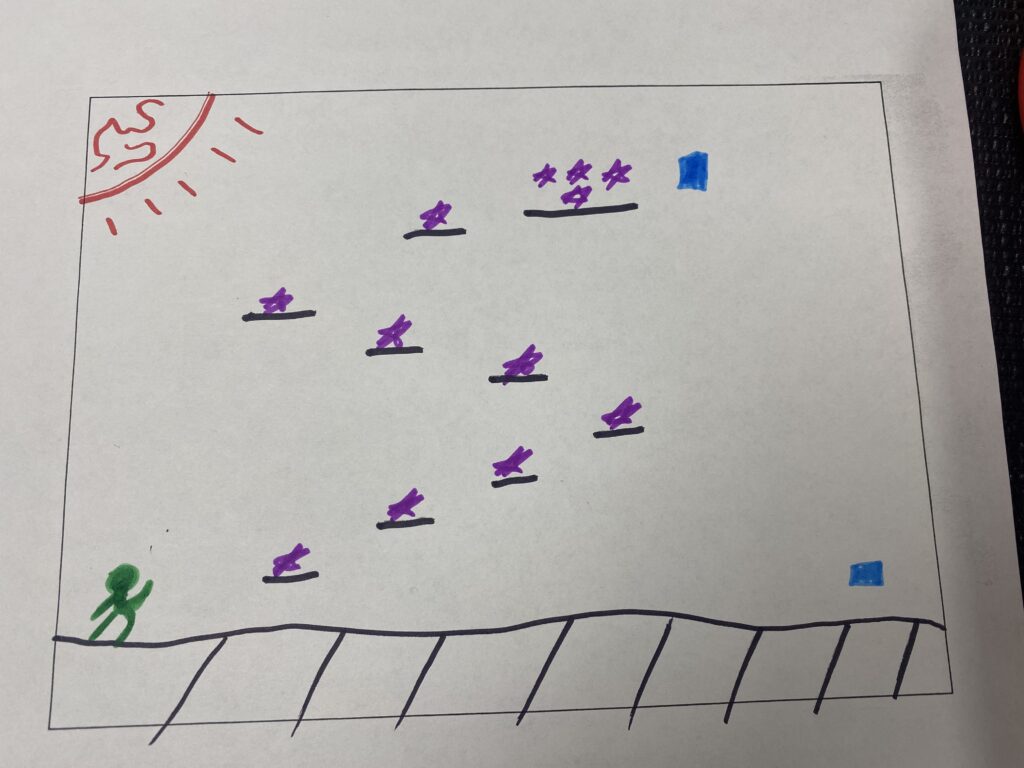
Pixicade is an interactive application that allows you to learn to create platforming games by drawing. The game comes with a manual, and then you use several color markers to draw your levels on plain paper. Each color marker represents a distinct element of the game. For example, black is used for barriers, walls, and platforms, green is used for the avatar, red is used for obstacles that cause you to lose the game if you touch them, blue is for the collectibles to establish a win condition, and purple is used for movable objects. After designing your level, photograph it with an iPad using the Pixicade application. Then, the app turns your drawing into A REAL GAME YOU CAN PLAY. It’s amazing. To put this into context, Nintendo’s first release, Donkey Kong, where the gorilla throws barrels at Mario while he tries to ascend a tower that took four programmers more than three months to build in 1981, working around the clock. I made a game with this app in 2 minutes without prior knowledge of platforming design. This type of application could be incredibly fun for students for several reasons. The app is easy to troubleshoot and has excellent scaffolding to build confidence using the tools to make power-ups and challenging enemies. Furthermore, the simplicity of use allows for constant redesign. If something doesn’t work correctly, a student can test it and then draw it again to try and achieve the desired effect. Applications like these would help to build self-confidence. Like to doodle? Great! Now, you’re a savvy game designer making incredibly fun-to-play levels. This would also be an excellent tool for thinking, sharing, and pairing with students. Perhaps having them create and design levels for their friends to play. The app could also allow for curricular connections to coding, level design, marketing and physics. Below I have linked my drawing and a short video of the playable game it created.

Train Building
I chose to tackle the second activity with a few of my peers. We attempted to design and build a train track that an automated train car could travel on and complete three separate loops. At first, I thought the challenge would be easy. These were just kids’ toys, right? However, it proved to be more difficult than I expected. Our table space was limited, and we used a design incorporating an overpass to combat this. While we did save a lot of space, the track proved difficult to change elevation gradually enough that the train could still navigate it. throughout the project, I found myself constantly disassembling portions and reassembling and redesigning. the process took almost half an hour but was incredibly fun. the feeling of building train tracks was nostalgic as well. Lots of people have memories of building track sets. I would consider curricular connections to math, physics, and social studies for this project. For math, students could create a drawing of their track ideas and then scale that up to the model set using the paper they designed as a to-scale representation of the table they would have to work on. Another Idea for math could be calculating speed over time and trying to build a track to have the train complete the entire route in as close to a minute as possible. For physics students could learn about force velocity and hoarse power. We could create a challenge to see how large an incline students could have their train summit while loaded. For social studies, students could study the history of trains, their impact on nations’ industrialization, and the importance of trains in logistics and supply management.
Conclusion
Attending the workshop at the design lab was a great opportunity. The design lab represents so many great things about education. Access to ways for students to learn how to 3D print, build games, design robots, and use VR can be fun andeducational. These experiences also teach students that it’s okay to make mistakes. In the closing of our workshop, the instructor described the design process to us.
Have and idea.
Design your idea
Build a prototype.
Test it.
Does it do what you want? If yes, think about ways you can improve it. If not, start designing again.
This mode of thinking is in line with a growth mindset and can take the fear out of failure. This process is also a wonderful introduction to students to the scientific method of creating and testing a hypothesis, although it’s more fun, in my opinion, when you’re designing battle bots.
Photo credit for this weeks featured image from Unsplash
